如何在BlueXP 复制和同步中更改扫描程序和传输程序的进程和并发限制
适用场景
- BlueXP 副本和同步(原CloudSync)
- 数据代理
问题解答
- 扫描程序/传输进程并发性可以从Cloud Manager UI或数据代理命令行进行更改。
- 使用Cloud Manager用户界面:
- 在Cloud Manager同步页面上、单击"管理数据代理"选项卡
- 使用Cloud Manager用户界面:

- 单击数据代理组旁边的设置图标
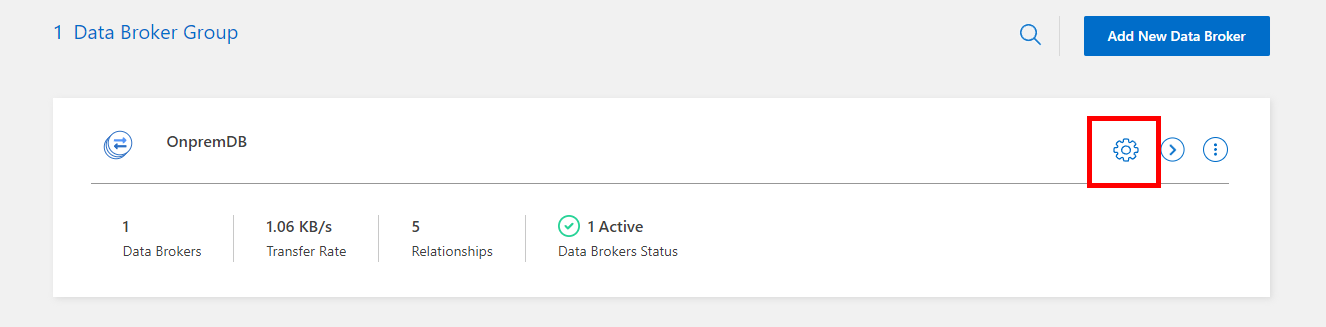
- 设置进程和并发性限制、然后单击"Unify Configuration"(统一配置)

|
警告 使用数据代理命令行界面时、必须编辑每个代理。 |
- 使用数据代理命令行界面:
> pm2 stop all
> vi /opt/netapp/databroker/config/local.json
{
   "workers": {
     "scanner": {
       "concurrency": <int>,
       "processes-limit": <int>
      },
     "transferrer": {
       "concurrency": <int>,
       "processes-limit": <int>
      }
    }
 }
:wq!
> pm2 start all
追加信息
不适用